Bulma is built using Sass. It uses Sass variables to define colors, sizes, spacing, and other aspects of the framework.
Customize with Sass
Customize Bulma with Sass variables
Install the dependencies #
To customize Bulma with Sass, you first need to install Sass. The recommended approach is to use the sass npm package.
npm install sass
npm install bulma
In your package.json, add one script to build Bulma, one to build and watch for changes:
"build-bulma": "sass --load-path=node_modules my-bulma-project.scss my-bulma-project.css",
"start": "npm run build-bulma -- --watch"
Your whole package.json should look like this:
{
  "dependencies": {
    "bulma": "^1.0.0",
    "sass": "^1.72.0"
  },
  "scripts": {
    "build-bulma": "sass --load-path=node_modules my-bulma-project.scss my-bulma-project.css",
    "start": "npm run build-bulma -- --watch"
  }
}
Create your Sass file #
Next to your package.json, create a my-bulma-project.scss file.
To overwrite Bulma’s Sass variables with your own value, write @use and the with keyword, which takes a Sass map:
// Set your brand colors
$purple: #8a4d76;
$pink: #fa7c91;
$brown: #757763;
$beige-light: #d0d1cd;
$beige-lighter: #eff0eb;

// Path to Bulma's sass folder
@use "bulma/sass" with (
  $family-primary: '"Nunito", sans-serif',
  $grey-dark: $brown,
  $grey-light: $beige-light,
  $primary: $purple,
  $link: $pink,
  $control-border-width: 2px,
  $input-shadow: none
);

// Import the Google Font
@import url("https://fonts.googleapis.com/css?family=Nunito:400,700");
Test out your setup by running the following command:
npm run build-bulmaYou should see 2 files appearing next to the other ones:
my-bulma-project.css, your CSS output filemy-bulma-project.css.map, an optional source map
Add an HTML page #
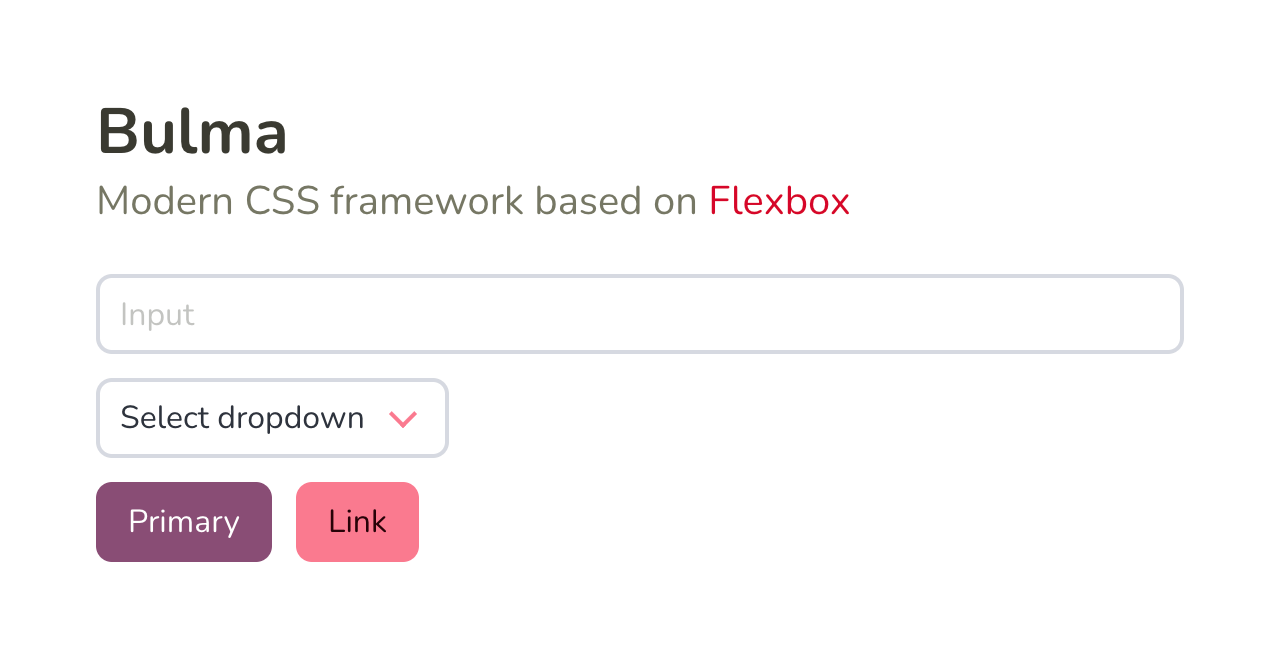
To view your Bulma project come to life, create an index.html page with the following content:
<!doctype html>
<html>
  <head>
    <meta charset="utf-8">
    <meta name="viewport" content="width=device-width, initial-scale=1">
    <title>Hello Bulma!</title>
    <link rel="stylesheet" href="my-bulma-project.css">
  </head>
  <body>
    <section class="section">
      <div class="container">
        <h1 class="title">Bulma</h1>
        <p class="subtitle">
          Modern CSS framework based on
          <a
            href="https://developer.mozilla.org/en-US/docs/Web/CSS/CSS_Flexible_Box_Layout/Basic_Concepts_of_Flexbox"
            >Flexbox</a
          >
        </p>
        <div class="field">
          <div class="control">
            <input class="input" type="text" placeholder="Input">
          </div>
        </div>
        <div class="field">
          <p class="control">
            <span class="select">
              <select>
                <option>Select dropdown</option>
              </select>
            </span>
          </p>
        </div>
        <div class="buttons">
          <a class="button is-primary">Primary</a>
          <a class="button is-link">Link</a>
        </div>
      </div>
    </section>
  </body>
</html>
Final result #
Your project folder should look like this:
|
|
index.html |
|
|
my-bulma-project.css |
|
|
my-bulma-project.css.map |
|
|
my-bulma-project.scss |
|
|
package.json |
And your final page will look like this:


